CryoSPARC
CryoSPARC (Cryo-EM Single Particle Ab-Initio Reconstruction and Classification) is a state-of-the-art software platform for processing cryo-electron microscopy (cryo-EM) data. It functions as a dispatcher for cryo-EM workloads across a cluster of servers and workstations. RCC provides full support for CryoSPARC on the Beagle3 cluster.
Installation and Setup
To use CryoSPARC on Beagle3, you must first obtain a license from CryoSPARC and provide the license ID to RCC through either:
After receiving your license information, RCC will configure your account and provide:
- Account credentials and setup details
- A dedicated base port (typically in the range
39100-39500) - A designated host machine name (
beagle3-login3orbeagle3-login4)
Getting Started
CryoSPARC's graphical user interface can be accessed through:
- Your local machine's web browser (recommended for better performance)
- Thinlinc
Initial Setup
Log into your assigned host machine (provided by RCC during account setup)
ssh [your-cnetid]@beagle3-[login3 or login4].rcc.uchicago.edu
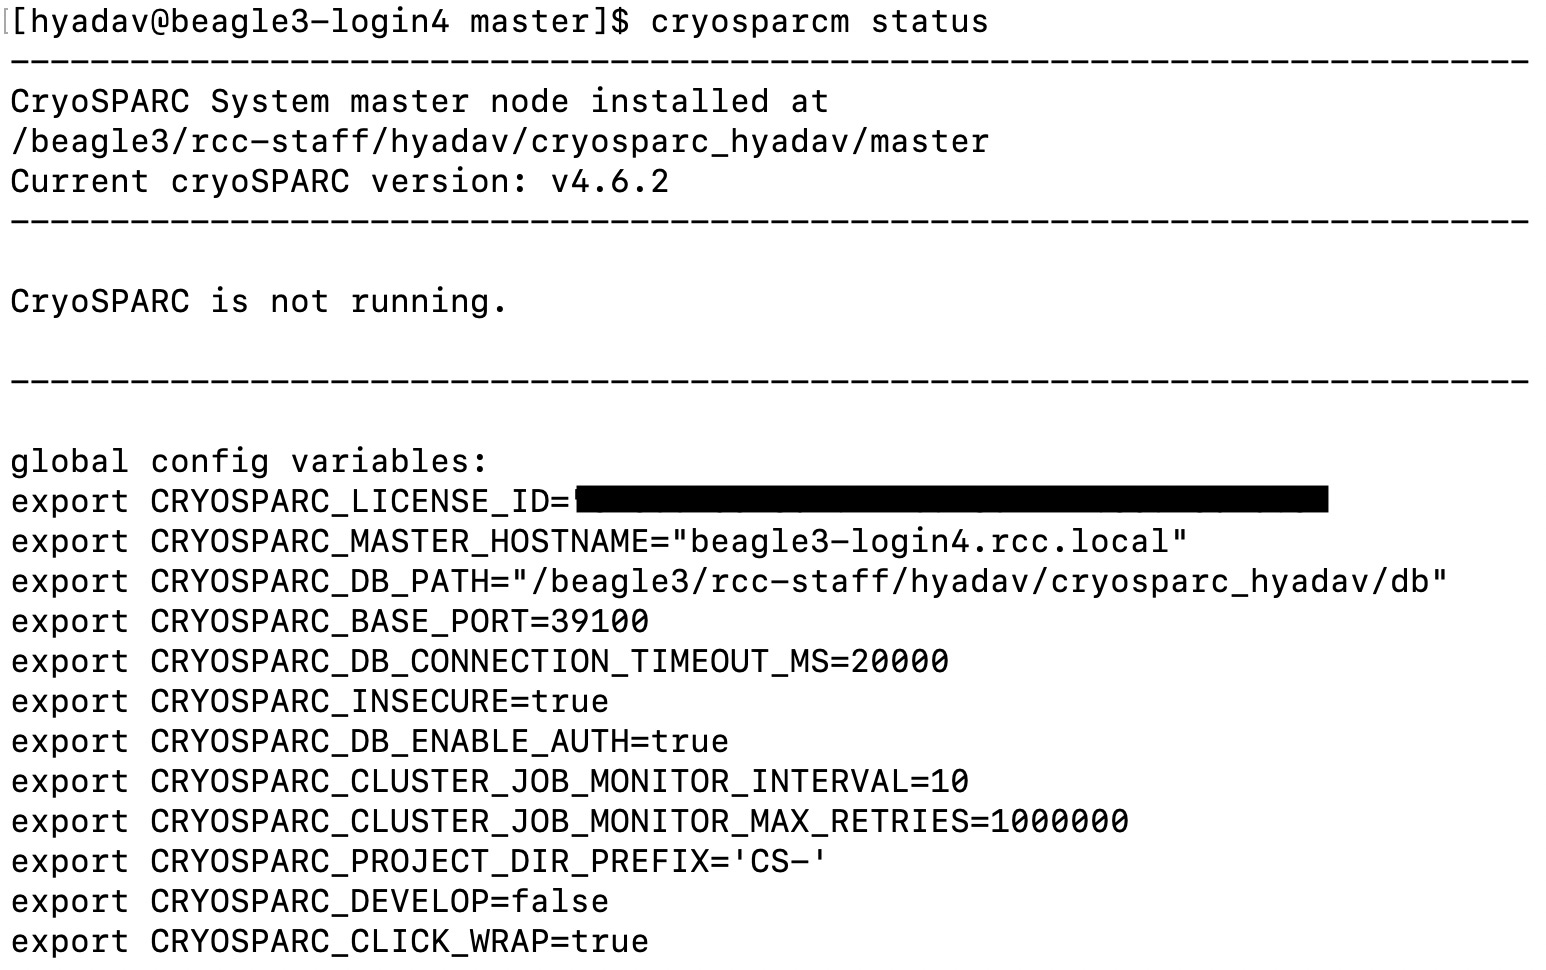
Check CryoSPARC status at any time using:
cryosparcm status
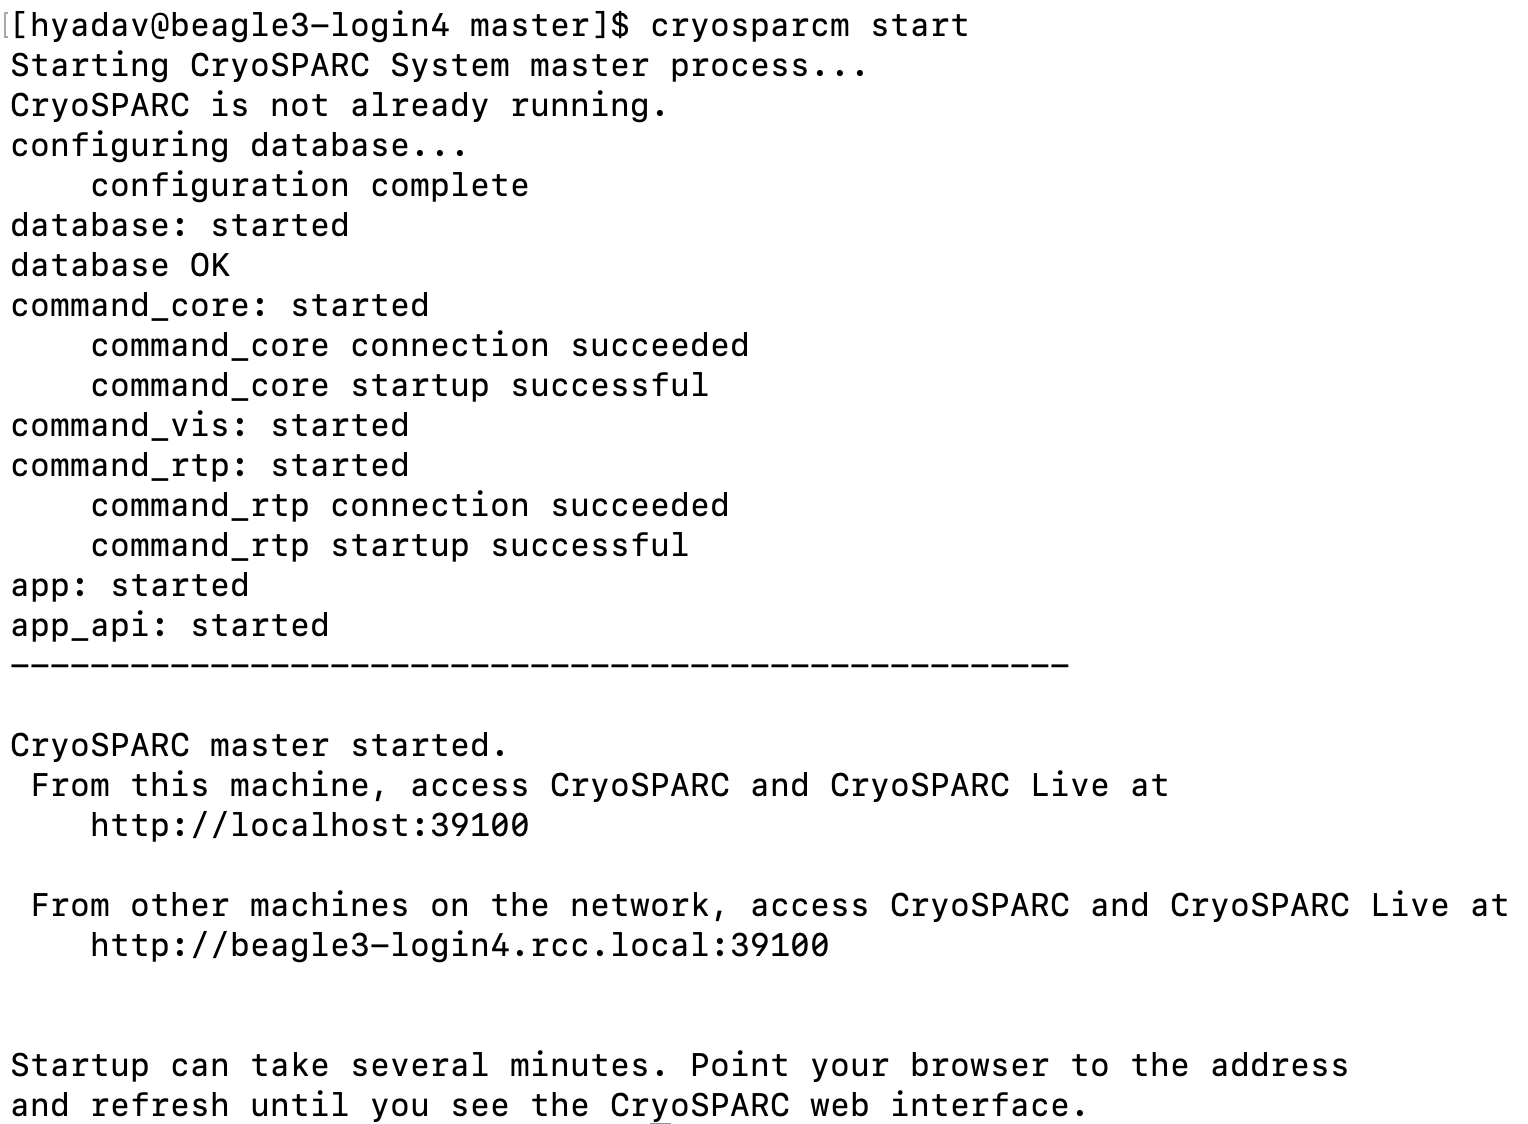
Start CryoSPARC if it's not already running:
cryosparcm start
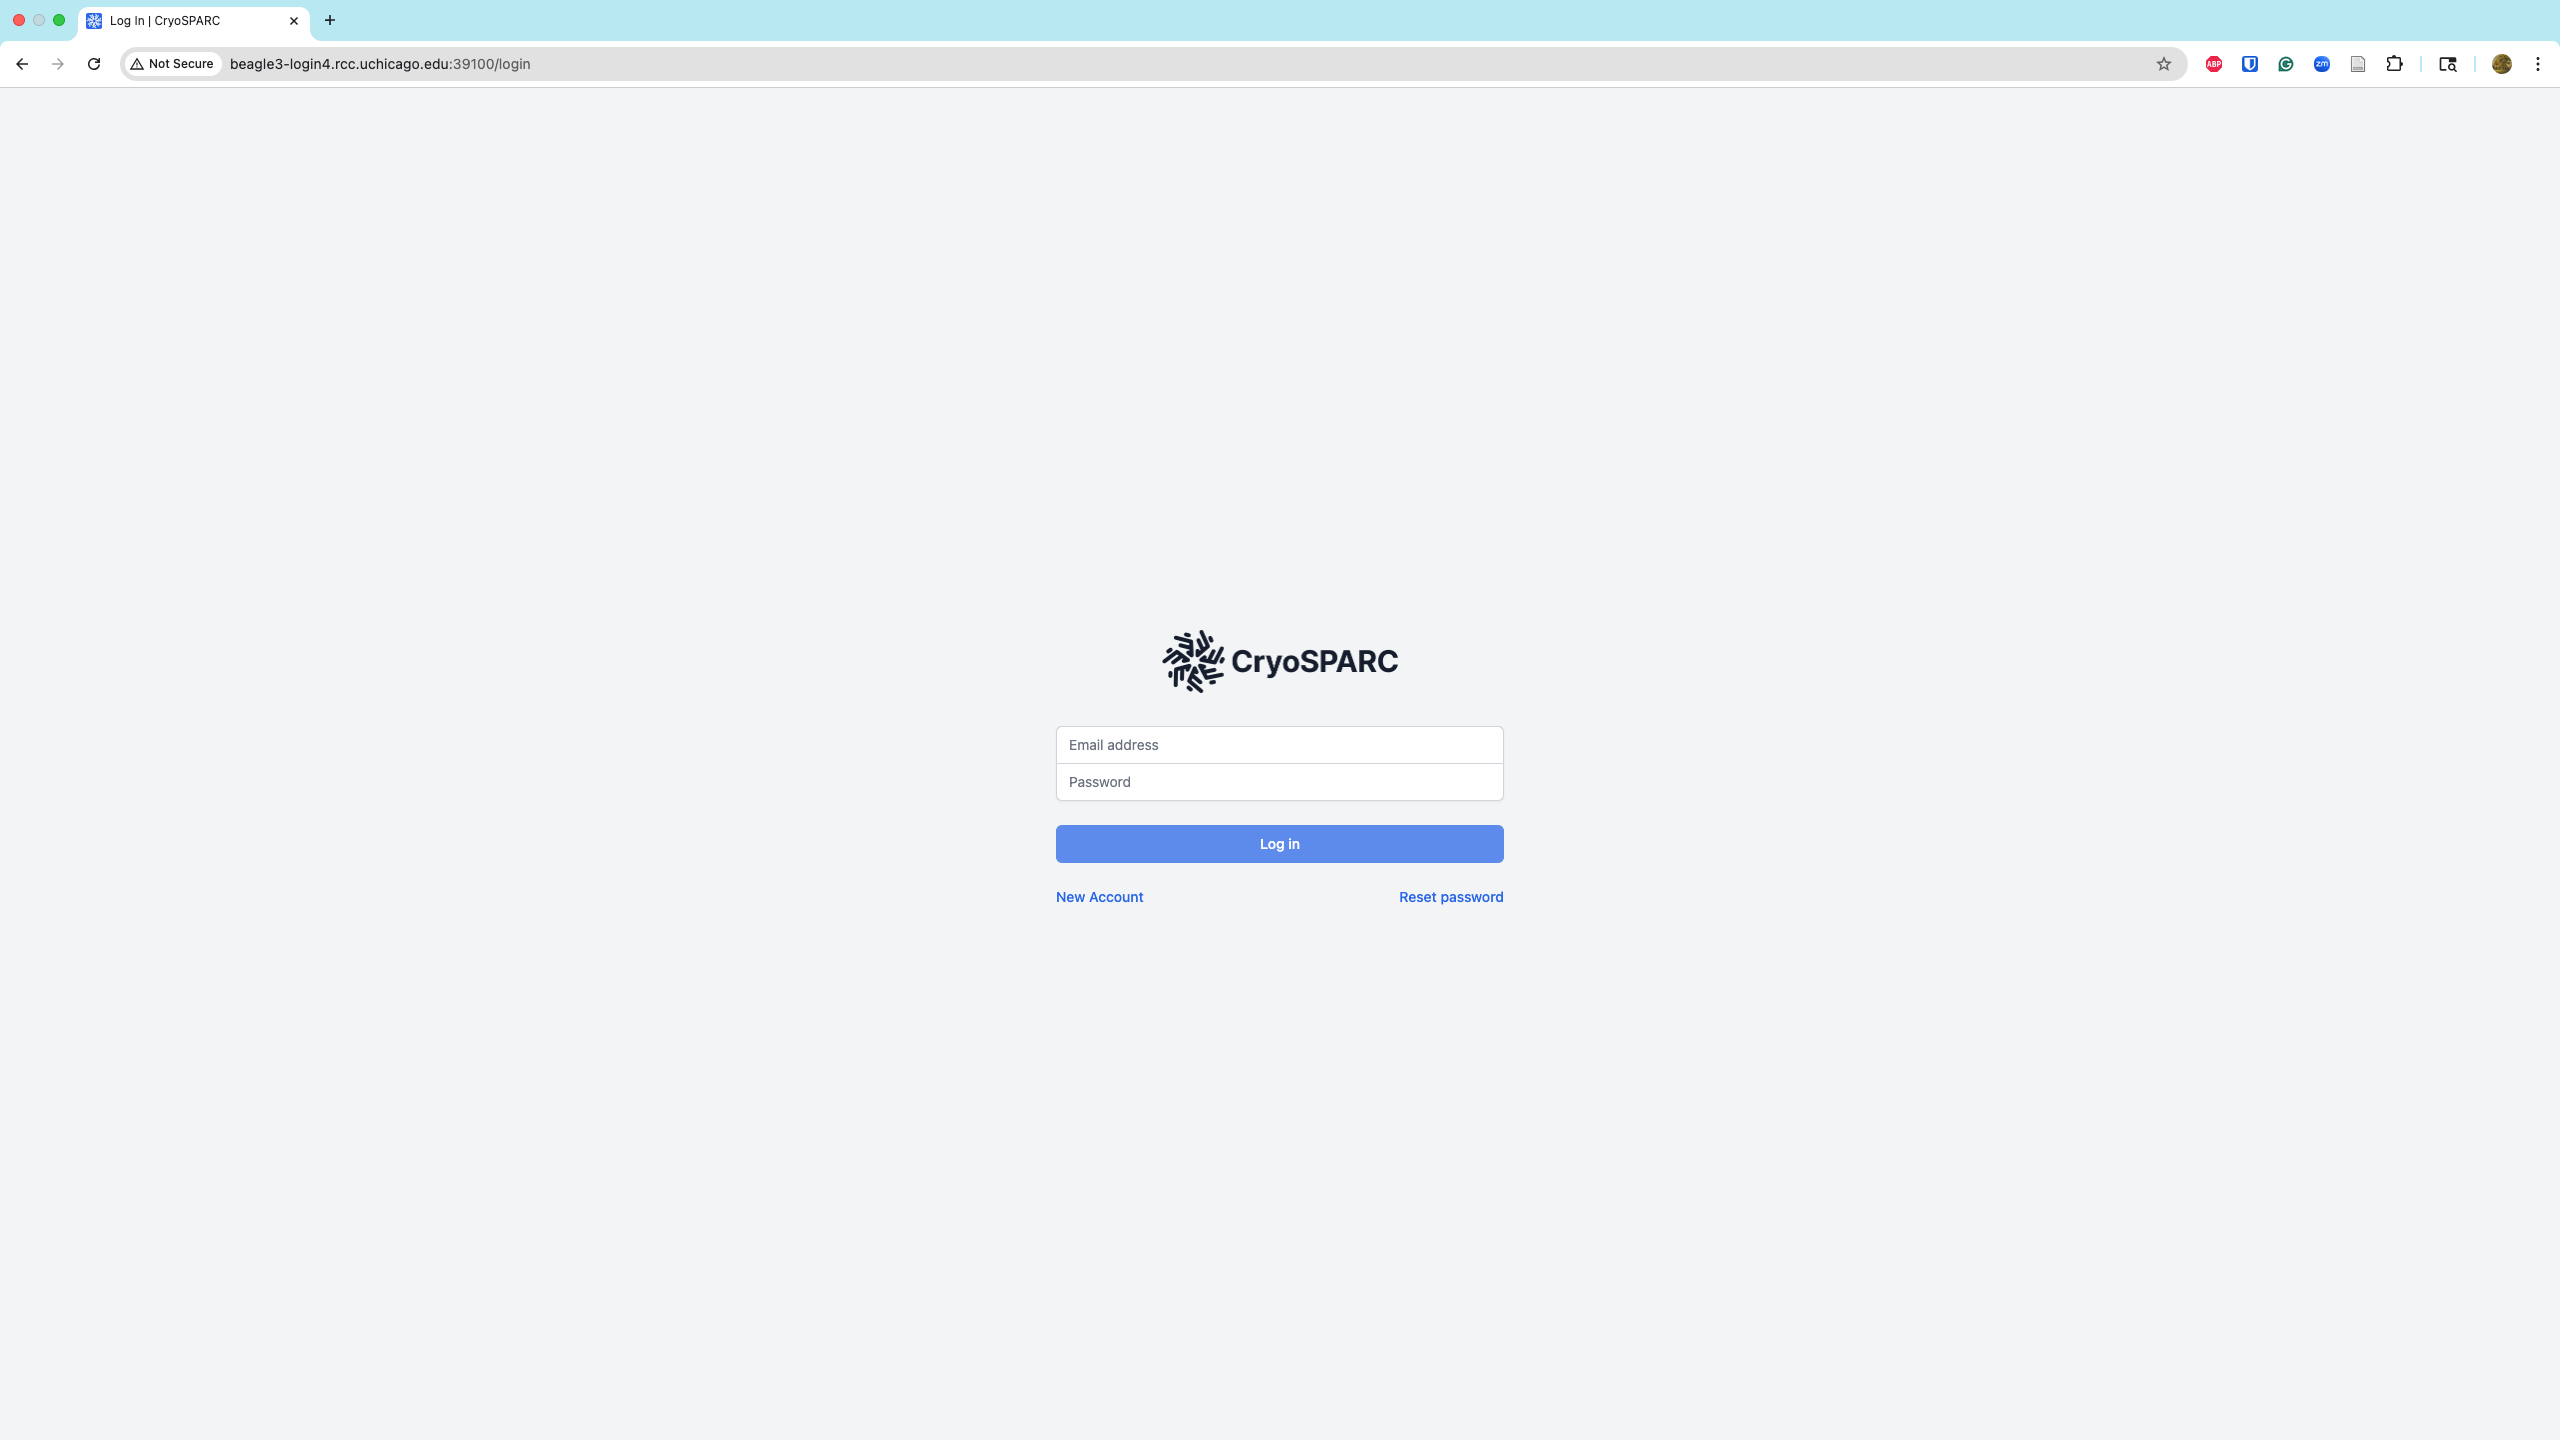
Accessing the GUI
Open a web browser (preferably on your local machine for optimal performance) and navigate to your assigned host machine and port. The exact host machine name and port are also specified in the config.sh file located in the master folder of your installation directory.
Example URL
http://beagle3-login4.rcc.local:39100/
Important
Always use the specific host machine name provided by RCC to avoid service disruptions.

Troubleshooting
For comprehensive troubleshooting guidance, refer to the official CryoSPARC troubleshooting documentation. The following sections provide solutions to common issues.
Socket Connection Error
Error message: unix:///tmp/cryosparc-supervisor–6410667835282660811.sock refused connection (already shut down?)
Solution:
-
Stop CryoSPARC:
cryosparcm stop -
Remove socket files: Delete the specific
.sockfile mentioned in the error message:rm /tmp/cryosparc-supervisor–6410667835282660811.sock -
Kill zombie processes: Find and terminate any lingering processes:
# Find process IDs ps -ax | grep "supervisor" | grep $USER ps -ax | grep "cryosparc" | grep $USER ps -ax | grep "mongod" | grep $USER # Kill each identified process kill <PID> -
Restart CryoSPARC:
cryosparcm start
Database Error
Error message:
E STORAGE [initandlisten] WiredTiger error (-31802) [1598020046:709343][4402:0x7f8f81a8fd40], file:sizeStorer.wt, WT_SESSION.open_cursor: unable to read root page from file:sizeStorer.wt: WT_ERROR: non-specific WiredTiger error
Starting cryoSPARC System master process..
CryoSPARC is not already running.
database: ERROR (spawn error)
-
Create database backup:
cp -rav db db_backup -
Stop CryoSPARC:
cryosparcm stop -
Remove corrupted database:
rm -rf db -
Kill zombie processes:
# Find process IDs ps -ax | grep "supervisor" | grep $USER ps -ax | grep "cryosparc" | grep $USER ps -ax | grep "mongod" | grep $USER # Kill each identified process kill <PID> -
Initialize new database:
cryosparcm start -
Stop CryoSPARC temporarily:
cryosparcm stop -
Restore database backup:
cp -rav db_backup db -
Repair database: Navigate to the
dbdirectory and run:eval $(cryosparcm env) mongod --dbpath ./ --repair -
Start CryoSPARC:
cryosparcm start